 | |
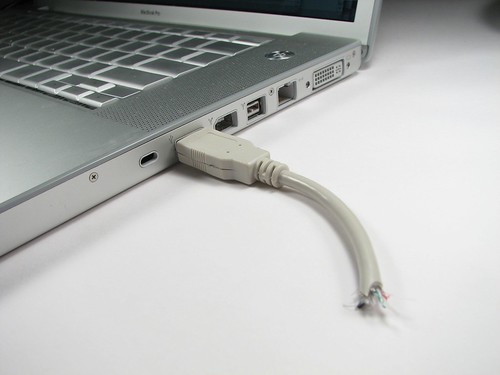
| Holy crap-- somebody just went and TORE MY FREAKING USB CABLE IN HALF while it was still attached to my laptop!!! No-- wait-- sorry. That's just my USB drive. My bad. Never mind. (And after the jump, how to make your own.) | |
| It's no secret that there are a lot of strange USB devices out there, particularly flash drives. Not a comprehensive list, but we've sure seen Lego, twigs, action figures, bowling balls, sushi, anatomical parts, transparent drives, erasers, cassette tapes and on and on and on. Despite all that, the picture above is a little surprising-- because yes, it's a working USB flash drive. Here, we give the step by step walk through of how to make your own.
| |
 |  |
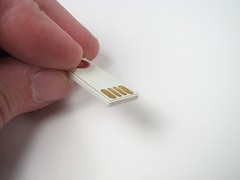 | 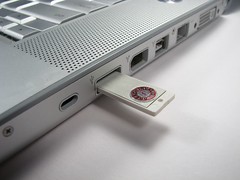 |
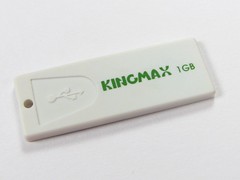
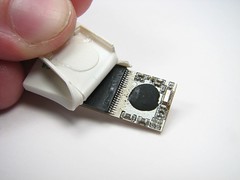
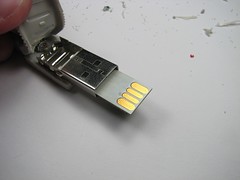
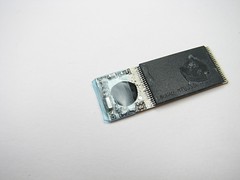
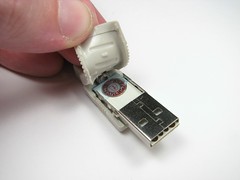
| This is a KingMax 1 GB USB flash drive, one of the smaller varieties out there. I got it on eBay for about $10 and there seem to be plenty more available. Above, you can see it in between my fingers and in my computer for scale. The gold pads are just printed pads on a tiny circuit board. | |
 | 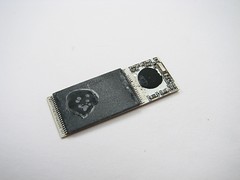 |
| The plastic cover is attached only weakly, by a bit of silicone adhesive, and peels off fairly easily to expose the bare printed circuit board of the flash drive. Not too much to it, really. | |
 |  |
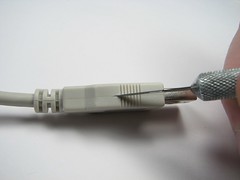 | 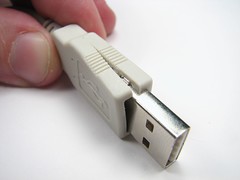 |
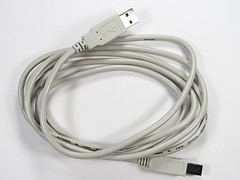
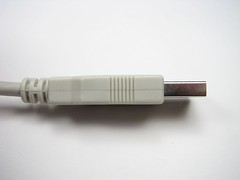
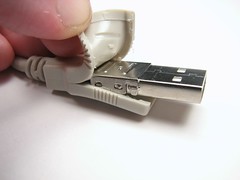
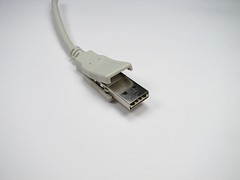
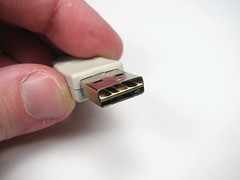
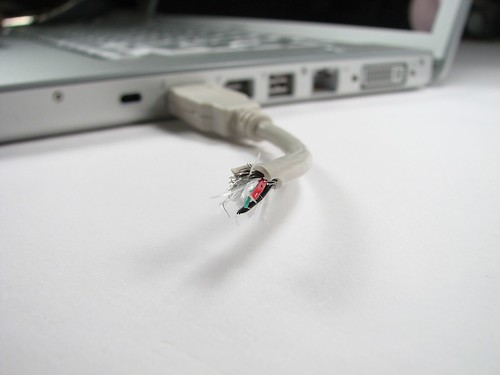
| Next we need a victim USB cable. I started with this new $1.50 USB "A-B" cable. Looking at the end that we'll be cutting up, you might notice a neat injection molding seam that runs around the edge. Using a sharp hobby knife, cut neatly along that seam. Cutting there actually provides some camouflage for you: Since we expect there to be a seam there, it's very hard to notice an additional cut as well. If you really want your seams to be invisible, you might want to use a black USB cable. Cut deeply enough that you actually cut through to the metal shell underneath the rubber, at which point you can start to peel back the rubber parts. | |
 |  |
 |  |
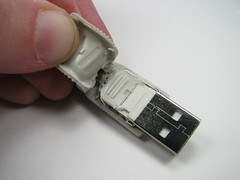
| The metal shell underneath the rubber overmolding consists of two of pieces of thin steel that are stamped and folded into place. They are held together by some tabs and slots-- use a small screwdriver to defeat the tabs and you can pull the flap the "lid" piece, so that you can now get at the inside of the metal shell. | |
 |  |
| With the one piece of the metal shell removed, you have access to the middle parts of the shell where the original USB wires and plastic and metal connections are located. Cut them away with your choice of tools. I found that the hobby knife worked well enough to sever the wires, at which point the remaining plastic parts could be removed pretty easily. What's left is just the metal shell-- ready for us to put our own circuit board in. | |
 |  |
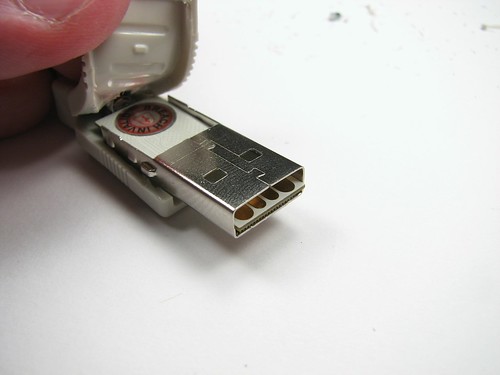 Now we can start to test-fit the bare-board USB drive into the metal shell. Seems to fit okay. Still need to fix it in place, though. | |
 |  |
| One other final detail to take care of: The back side, where the circuit board will be resting, has some metal parts that the back side of the circuit board will be touching-- so we need an insulator there. I had an old piece of clear blue heat-shrink tubing that happened to fit well, but a piece of electrical tape would have done the job too. Once that was added, it all looked safe and still fit together. | |
 |  |
 |  |
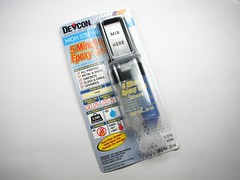
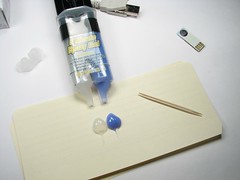
| To bond everything together and fill all the extra space inside the USB cable end, I use gel-style 5 minute epoxy. Fortunately, five minutes gives you enough time to apply the glue, place the flash drive in place, and put the rubber molded housing back on. Hold the connector firmly-- paying attention to the seams for alignment-- until the epoxy cures, about five more minutes. Last step: Cut the cable as desired. A jagged cut looks different than a clean cut-- take your pick.
Above was taken from my email but originally published [here], even tho all the info is intact today you still might want to visit that site because I surely enjoyed this hack and there might be more there. | |


No comments:
Post a Comment